Setting up Views in Your Own Templates or in Existing Projects
Shows step-by-step how to set up views in a project or a template that have not been created with LINEAR to use the view control.
Before you begin
You are working in a template or in a project that already contains views and that was not created with LINEAR Solutions but without LINEAR template. You want to set up the views so that you can use the view control.
Requirement:
The template or the project that contains unassigned views is open.
Navigate to:
Procedure
- Click on
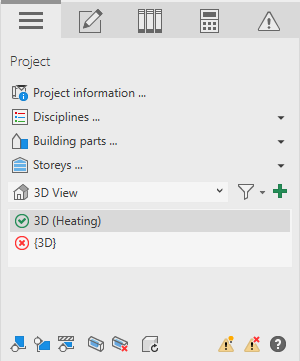
 at the bottom of the Project tab and select the desired view type from the drop-down list that appears, e.g.
  Floor plans.
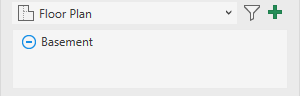
 All views of the selected type are displayed on the bottom panel. Unassigned views are marked with the
 icon.
icon. - Select the view you want to set up.
- Select the building part contained in this view and also activate the check box.
- If the view is a section or a 3D view, use the
 button to show the storeys that are to be displayed.
 - Select the storey to be displayed in this view.
- Activate the check boxes of the disciplines to be displayed in this view.
- Select the discipline for the Construction, Library and Analyse tab.

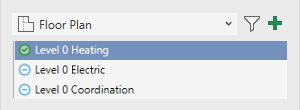
Results
In the Suitable views area, the selected view is marked with the  suitable.
What to do next
Repeat the process for all other views.