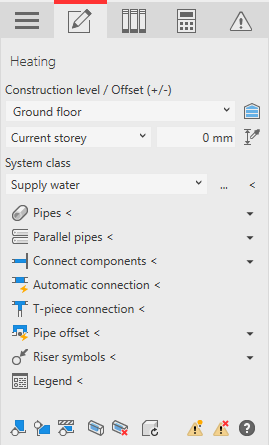
Selecting Construction Level and Offset
Shows step-by-step how to set the construction level on which you construct pipes, ducts, and components.
Before you begin
To construct freely placed pipes, ducts and components at the desired height, first set the construction level. The following applies:
construction level = reference level + offset.
Navigate to:
or: Library tab
Applies to: heating, potable water, waste water, ventilation, panel heating/cooling, cooling, gas, void planning, fire protection.


Procedure
- Select the reference level.
- Select the datum level. If the datum level conforms to the reference level, select Current storey. Tip:
The current reference level (Current storey), the next higher storey level and all work levels that may be located in between are available as datum level.
- Enter an offset to the datum level.
If the component is to be located below the datum level, enter a negative offset.
Results
If you construct pipes in a floor plan view, 3D view or an area plan, or if you insert components from the library tab, the set construction level is used as the height.