Details on Import: …
Information on the dialog Import: ... for the import of component lists from an Excel file.
In this dialog you define which parameters are written to the Revit model when the component lists are imported. If you have previously exported the file to be imported with the LINEAR Excel-Export and have used the row indicator Element-ID or Worksharing-ID, the assignment of the parameters is done automatically based on the metadata of the headline of the xlsx file.
You are here:
 Automatic parameter assignment: If the file does not contain an identifier for the rows, the program attempts to automatically assign suitable Revit parameters to the Excel parameters after clicking on this button. Parameters with the exact same name are always linked. If, for example, a column with the name “Exhaust air flow” was created manually in the Excel file, the program searches for a parameter with the name - “Exhaust air flow” - in the project. In case of a match, the new parameter is automatically assigned from Excel.
| Column | Description |
|---|---|
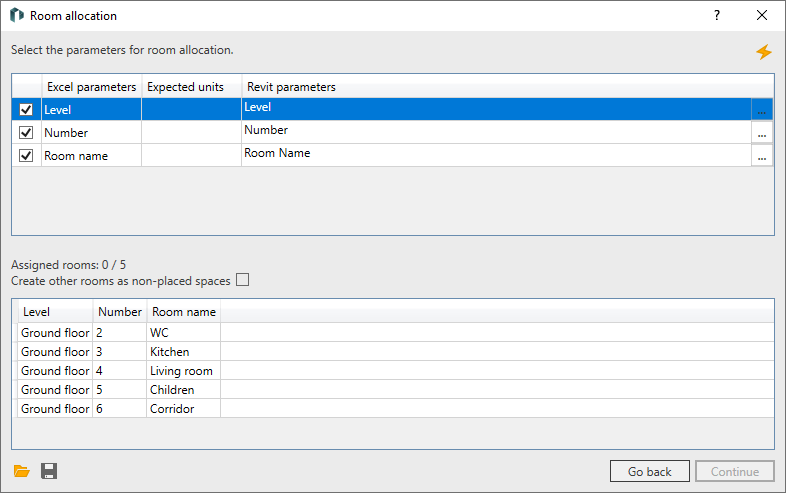
| Column 1 | Enabled: The parameter is imported from the xlsx file into the Revit model. If checkboxes are not selectable, the parameters are already used for Room allocation . |
| Excel parameter | Shows all column names from the worksheet to be imported. |
| Expected units | Shows in which units the parameters are transferred to the Revit - model. The expected unit depends on the assigned Revit - parameter. |
| Revit parameter | Determines which Revit - parameter is assigned to the selected Excel - parameter for import. Clicking on If parameters are to be written to an element or component that is write-protected, an error message is displayed during import. The error log, which you can open by clicking on the error message, gives you more detailed information about the cause of the error. |
 opens the
 Assigned elements: .../...
Shows how many elements are already assigned to a room during import with row identification. In front of the forward slash the number of assigned elements is shown. Behind the forward slash the sum of the elements of the list to be imported is shown.
When importing in Room Identification mode , this information is not displayed because it is the content of the upstream Room allocation dialog.
Further settings
 Load configuration from external file: Opens the file explorer in which you can load a previously saved configuration in JSON format. The last loaded configuration is automatically used the next time the command is started.
 Save configuration to external file: Saves the current parameter selection with the corresponding assignments in a JSON file.
Create new parameters in: Drop-down list for selecting the parameter binding in case that new parameters are imported from the Excel file. The following options are available:
Project: When creating the parameter, it is created category-bound. This setting is useful if one or more suitable categories are available, such as the category “air outlets” for air outlets.
Family: When creating the parameter, it is created in the corresponding family. This setting is useful if a category-related parameter would affect irrelevant components, e.g. the parameter “mass flow rate”, which is only required for the radiator in the category “HVS components”.