Configuring and Drawing Radiators
Shows step-by-step how to configure radiators with the LINEAR Solutions and then insert them into your drawing.
Before you begin
You want to configure radiators individually and then insert them into your drawing.
Navigate to:
Procedure
- Click on the Radiator… button.
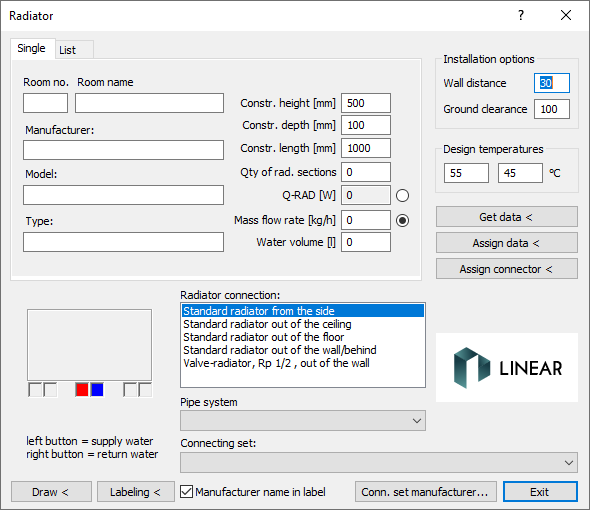
The Radiator dialog opens.

- On this tab, enter all information on designations, dimensions, distances, flow rates, temperatures, installation options, ground clearance, etc. in the text fields.
- Determine the position of the supply (red) and return (blue) connections by clicking in the fields around the drawing at the bottom left of the dialog.
- Specify the connection variant for the radiator in the radiator connection field.
- Optional: Click on the Connection set manufacturer... button to select a specific manufacturer for the pipe system and connection set. The Select manufacturer dialog opens.
- Optional: In the Select manufacturer dialog, select a manufacturer for the pipe system and connection set and confirm your selection with OK. The dialog closes and the selected manufacturer is transferred to the Radiator dialog.
- Optional: Select a pipe system from the selected manufacturer from the Pipe system drop-down list.
- Optional: Use the Connection set drop-down list to select a connection set from the selected manufacturer.
- Click on the Draw < button. The radiator is attached to the crosshairs.
- Click to place the radiator on the drawing area and click again to determine the alignment.
Results
You have inserted the radiator into your drawing.
The insert command remains active and you can insert the configured radiator model multiple times.