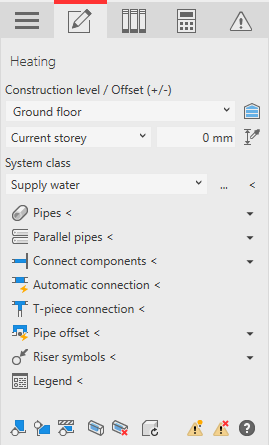
Setting Parallel Pipes
Shows step-by-step how to set parallel pipes.
Before you begin
In the dialog Set parallel pipes you configure the pipes which already have a constructed pipe run with parallel pipes in order to extend them to a pipeline corridor. The pipes can be assembled from various disciplines and system classes, materials and dimensions. In the ventilation discipline, the function for round air ducts can be used.
Navigate to:
Applies to: heating, potable water, waste water, ventilation, cooling, gas, fire protection.
Procedure
- Open the Parallel pipes section.
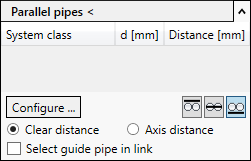
- Click Configure....
The Set parallel pipes dialog opens.
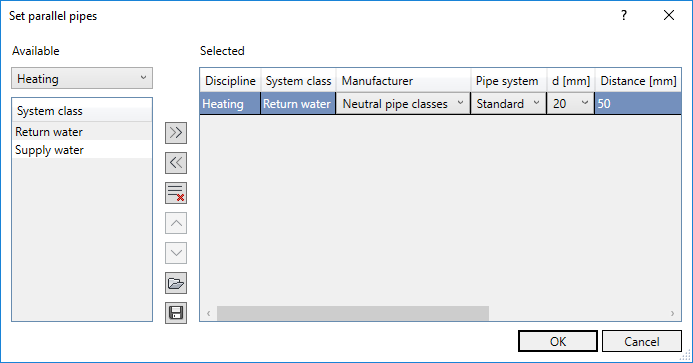
- If necessary, remove individual pipes by selecting the row and clicking << or delete the entire list using
 Delete configuration.
 - In the Available section on the left, select the discipline and system class for the desired pipe.
- Click
 Apply to configuration to add the system class to the configuration table in the Selected section.
 - In the configuration table, select the pipe system, diameter and distance to the previous pipe.
- Add additional pipes to the configuration table if necessary. Tip:
The order of the pipes can also be changed by drag and drop.
- Click OK to apply the settings.
Results
The parallel pipes are configured and are displayed in the Parallel pipes section.
The last created configuration of the parallel pipes is stored in the program and is available in other disciplines and projects.
What to do next
Use the Parallel pipes < function to extend an already designed pipe run to a pipeline corridor.