Assigning Insulating Material
Shows step-by-step how to assign insulating material to pipes.
Before you begin
You want to assign insulation material used in the calculation to pipes in the model.
Requirements:
-
The pipe network is closed an can be calculated.
-
The pipe network is detected.
Navigate to:
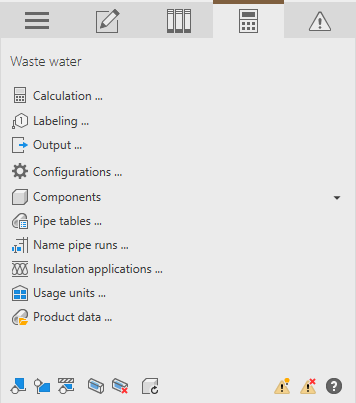
Procedure
- Click Insulation applications ...
The Assign insulating material dialog opens.
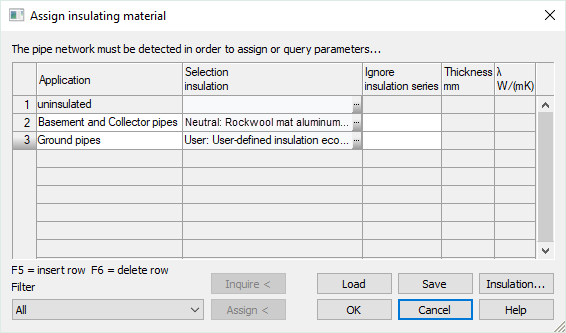
- Click in a free line of the table to create a new case of application for the insulation assignment.
- In the Application field, enter a name for the case of application.
- In the Selection insulation field, click ... to select an insulating material.
The Tables of insulation dialog opens.
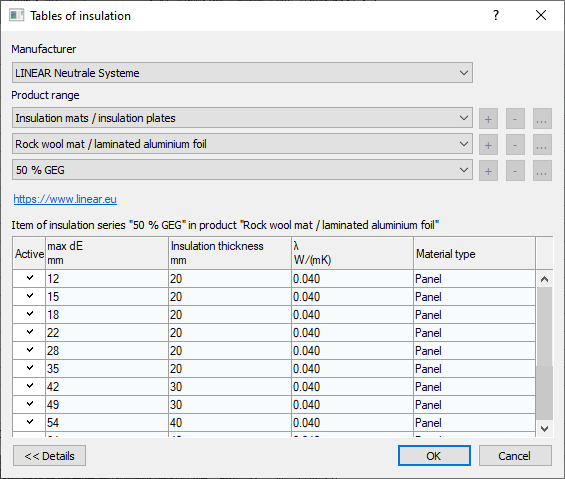
- Select an insulation material and close the dialog with OK.
- Repeat the steps 2-5 if you want to define further cases of application.
- If you have created several cases of application, mark the line whose properties you want to assign to the pipes.
- Under Filter, select which pipe types are to receive the properties.
- Click Assign<.
- Select the pipes that are to receive the selected material settings and confirm with Enter. Note:
When assigning, please note that material changes can only be carried out behind T-pieces and behind built-in parts with dimension changes.

- If necessary, repeat the process for further cases of application.
- Close the Assign insulating material dialog with OK to save the settings in the project.
If you want to use the same settings in other projects, click Save.
Results
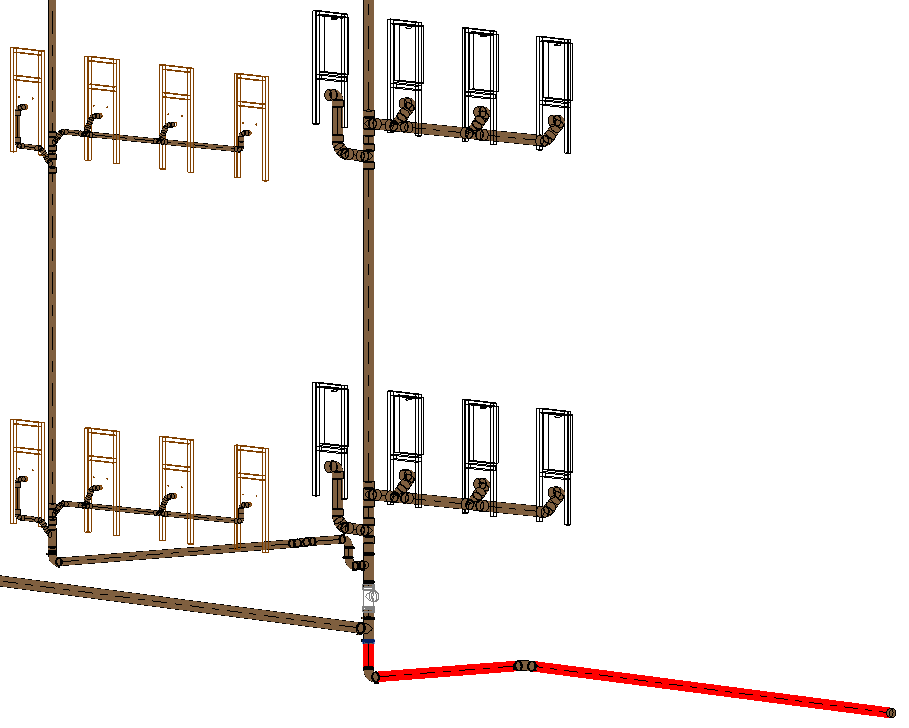
The insulating materials are assigned an can be displayed using the Visualization... function.