Assign Spaces to Zones
Shows step-by-step how to assign spaces to zones.
Before you begin
You would like to assign the spaces created in your model to zones.
Requirement:
Spaces are available.
Navigate to:
Procedure
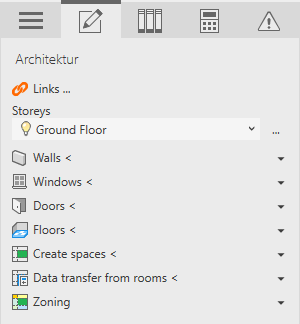
- Open the Zoning section and select Zones.
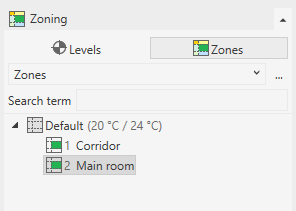
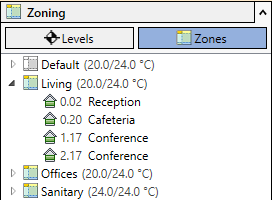
- In the upper area, use the drop-down list to select an zone type, e.g. Zones.
- Select the room you would like to assign to a zone, e.g. a zone with different target temperatures.
- Optional: Hold Ctrl and select other rooms you would like to assign to the other zone.Tip: Use the search to find all spaces with the name Office, for example, select them together and then move them in one step.
- Right-click to open the context menu.
- Move your mouse over the menu item Move to.
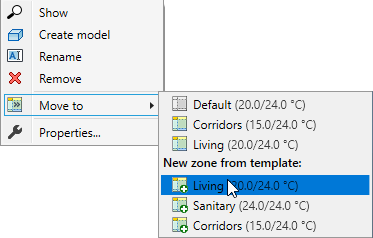
- Select the desired zone. Note: Alternatively, you can create a new zone by selecting an option under New zone: and move the room to it at the same time.Note: If you move a room to another zone in the zoning, the attribute in the space properties will change as well.
Results
The selected rooms have been assigned to the other zone.