Configuring Parameter Synchronization
Shows step-by-step how to configure the synchronization of parameters between LINEAR Building and a connected Revit and save the configuration.
Before you begin
You want to define the direction in which synchronization should take place for each parameter for building detection or an update with a connected CAD. You want to save the configuration for use on other workstations.
Navigate to:
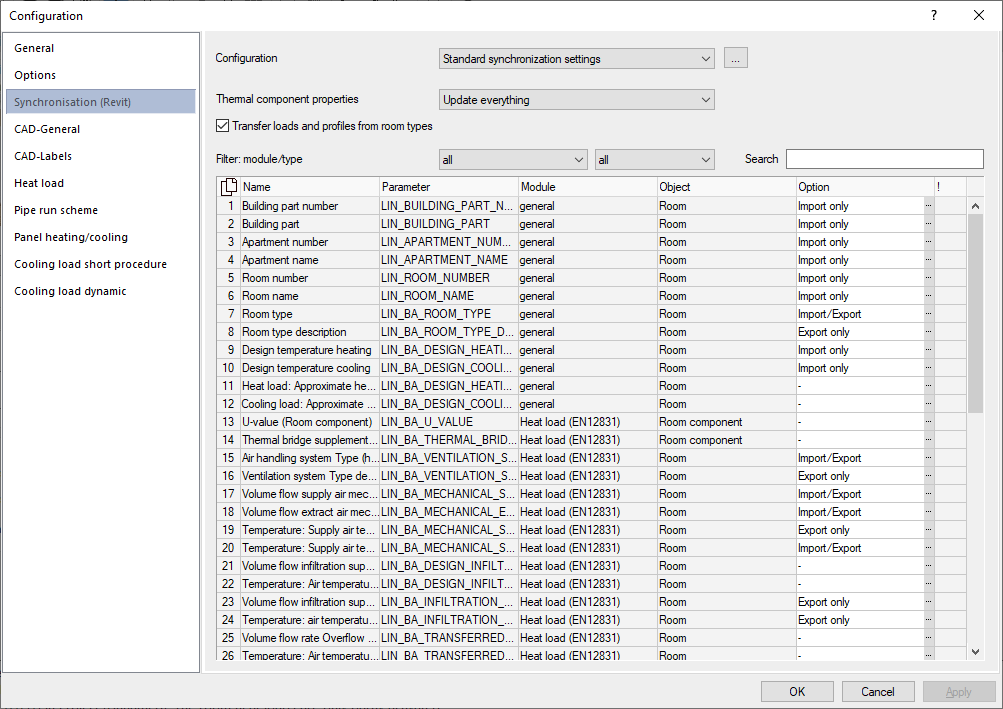
Procedure
- Click
 next to the Configuration drop-down list and then on Add in the context menu.
 - Enter a suitable name for the new configuration and click OK.
- In the drop-down list for Thermal component properties, specify how thermal component properties from the connected CAD should be handled in the event of a building detection or update. Note: If you create layer structures and thermal properties manually in the LINEAR Building master tables, the Do not update option should be selected at this point to avoid data loss.
- Activate the Apply loads and profiles from room types (dynamic cooling load) option if you want to calculate the dynamic cooling load and transfer existing information on rooms from the model.
- In the drop-down lists under Filter: Module/Type, filter the parameter table as required.
- In the Option column, click on
 to set the desired behavior for the respective parameter in the context menu.
 - If the new configuration is to be used as the default for future building detection or update, click on next to the Configuration drop-down list and click on As default template.
- Next to the Configuration drop-down list, click again and on Export.
- Save the configuration with a file name of your choice in the desired directory.
Results
All parameters are set as required and the configuration is saved for use on other workstations.