Inserting Components from LINEAR CAD Browser
Shows step-by-step how to insert components from LINEAR CAD Browser.
Navigate to:
Applies to: Architecture, Heating, Potable water, Waste water, Ventilation, Panel heating/cooling, Cooling, Gas, Fire protection.
Procedure
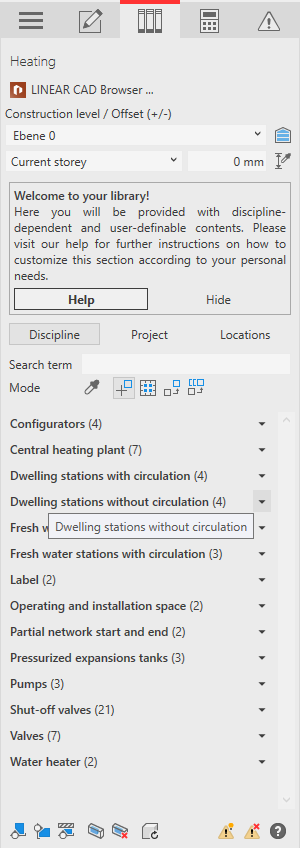
- Select the reference level in the Construction level/ Offset (+/-) section.
- Select the datum level. If the datum level conforms to the reference level, select Current storey.
- Enter an offset to the datum level.
If the component is to be located below the datum level, enter a negative offset.
- Click LINEAR CAD Browser ....
The LINEAR CAD Browser program opens.
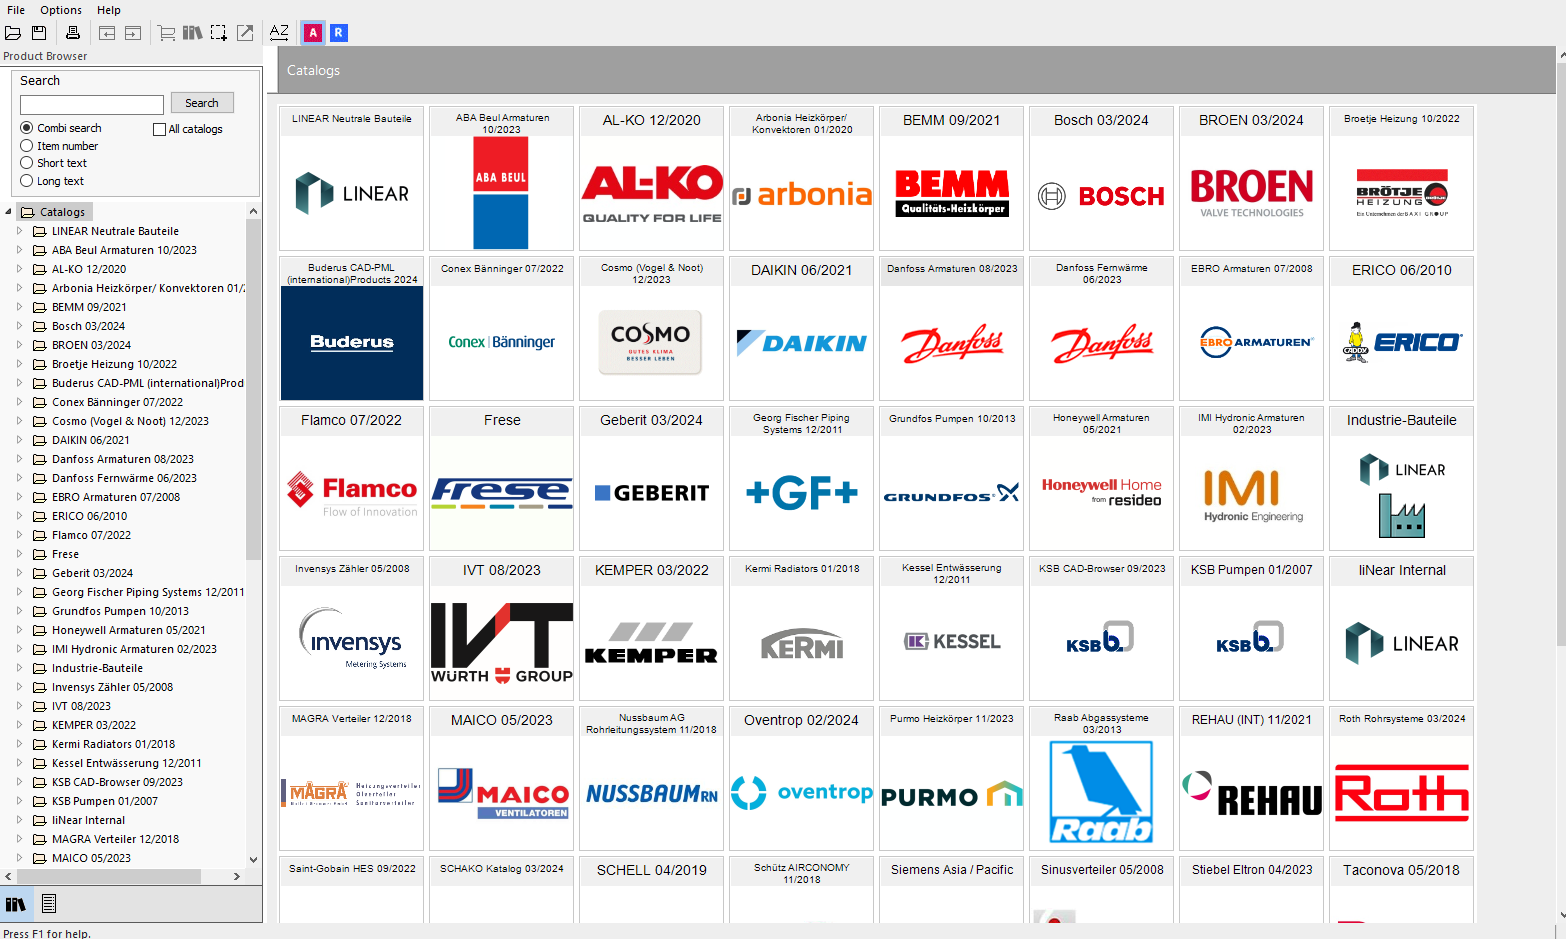
- Select the desired manufacturer catalog in the tree structure or in the output window or activate the All catalogs checkbox to search in the entire CAD library.
- If necessary, adjust the desired search option (combi search, item number, short text or long text).
- Enter the desired search term in the Search area and confirm your entry or click on Search. The first component that matches the search term is displayed in the output window.
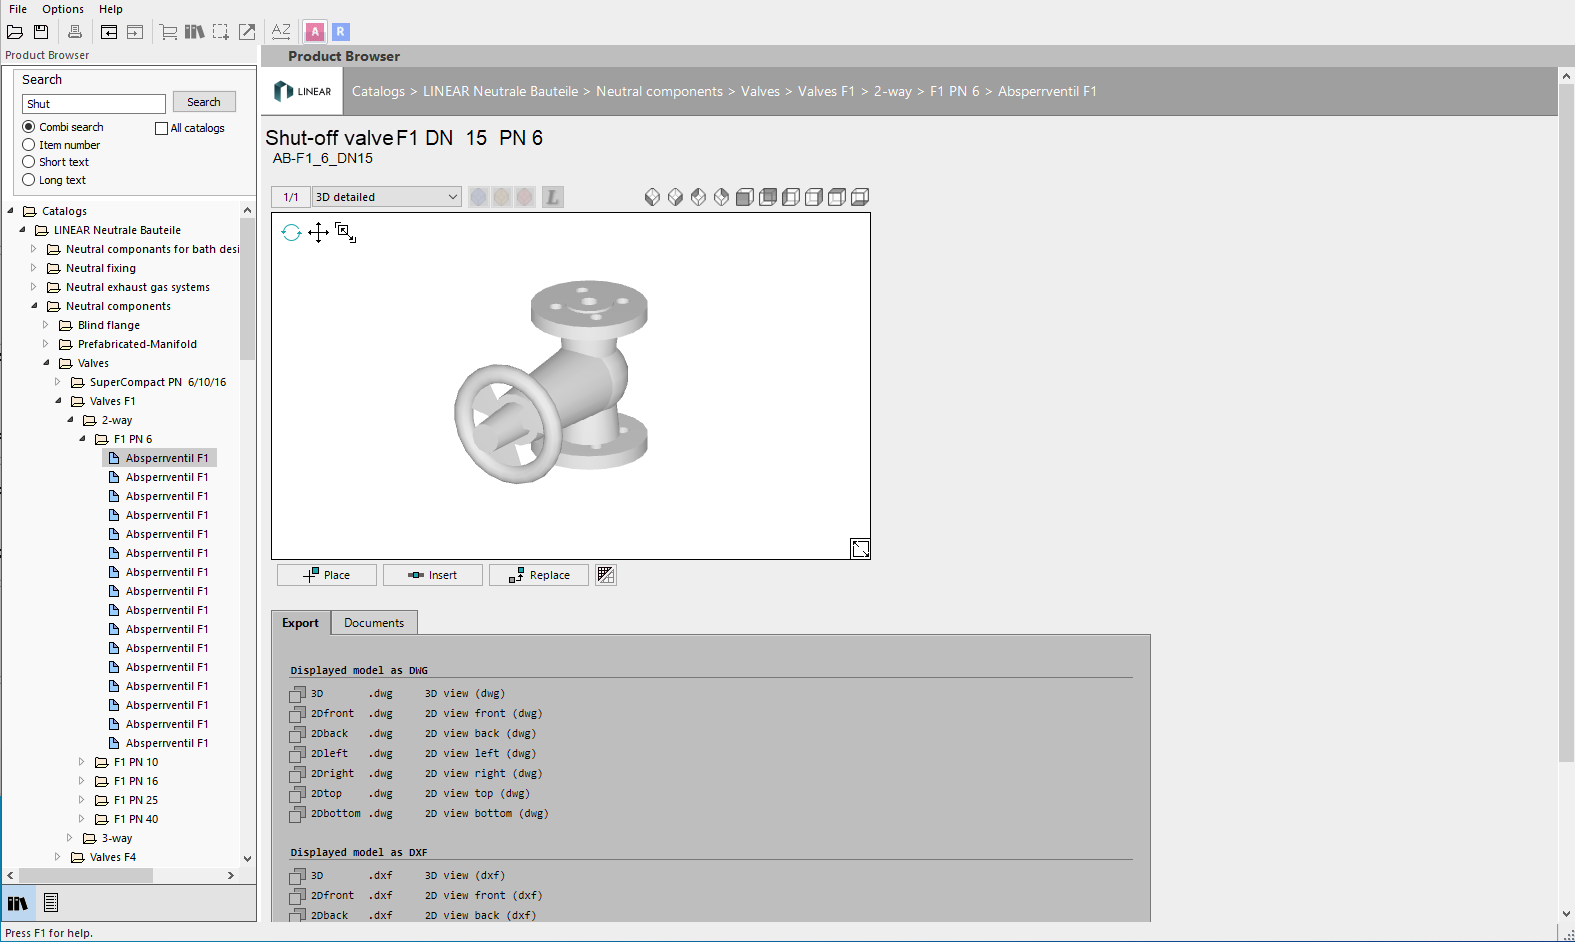
- If necessary, click Search again or press Enter to display the next result.
- Click Place. If the selected product is a built-in component, click Insert.
The component is connected to the cursor.
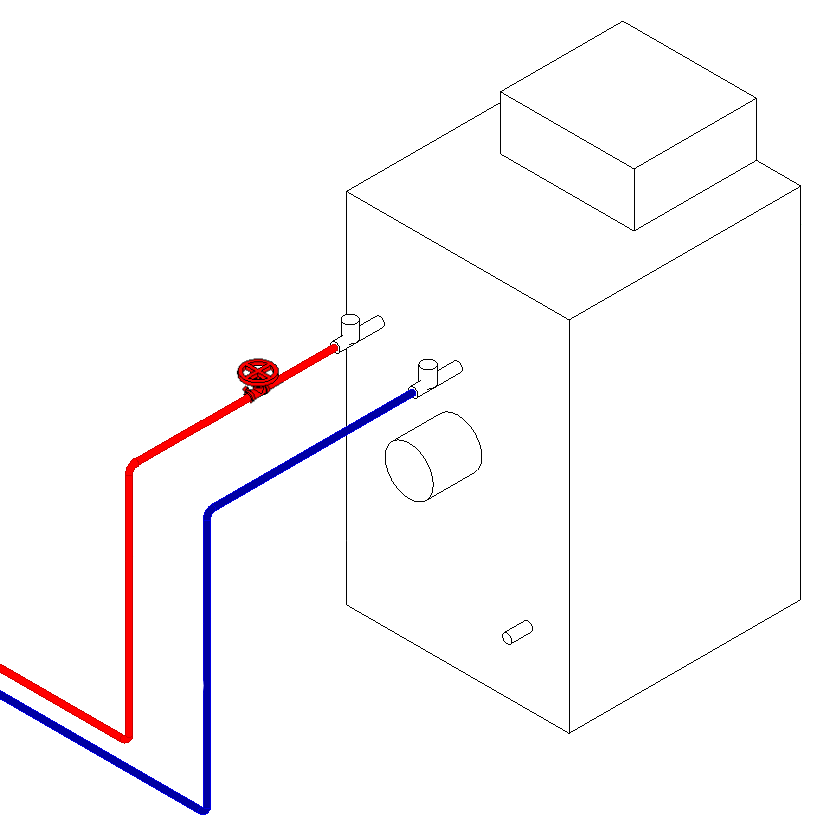
- Place the component. If the component is a built-in part, it can be inserted into a pipe. Use the Space bar to rotate the component.
- Press ESC to end the command and reactivate the LINEAR CAD Browser Note: When inserting multi-part components (e.g. split heat pumps), after inserting an element in Revit, the LINEAR CAD Browser automatically switches to the element of the component that is still to be installed.
Results
The component has been inserted.