Details on Frame
Information on the Electrical device dialog in connection with the trade Electrical.
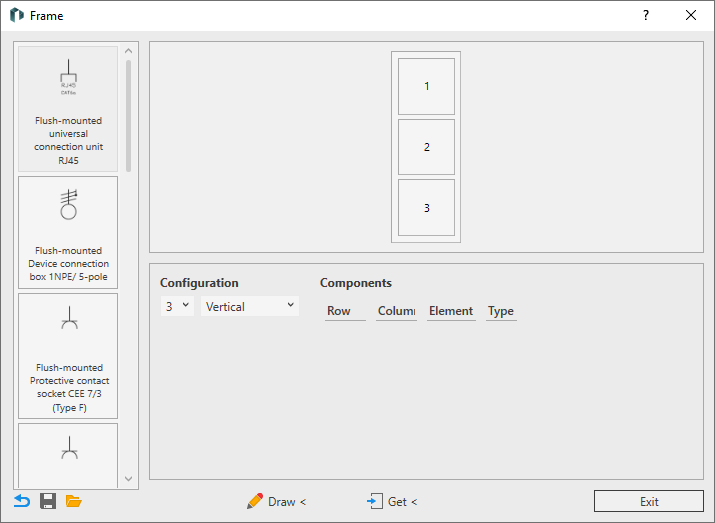
This dialog enables the vertical or horizontal configuration of switch frames with up to five positions. The last changes made to a configuration are saved in the project and displayed when the dialog is reopened.
You are here:
Component library
Gallery of all available components for equipping the switches. Individual components can be dragged and dropped to the desired position.
2D Configuration
2D representation of the switch frame. The positions are numbered in columns or rows, the alignment of the configuration can be set to vertical or horizontal in the Configuration area. In the Configuration area, you can define up to 5 positions for the switch frame. Positions 4 and 5 are placed above position 1 in the vertical version as required.
The individual positions can be equipped with components from the component library using drag-and-drop. If a component from the component library is placed in a position that is already occupied, the existing component is replaced. Components can also be subsequently moved to a different position in the configuration using drag-and-drop. If there is already a component at the target position, the positions are swapped after dropping. A placed component can be copied to other positions in the configuration by holding down the Ctrl key and dragging and dropping. If the target position is already occupied, the existing component is replaced with the copied component. A component that is not required can be selected and removed from the configuration using the Del key. As long as the configurator is open, any action can be undone with Ctrl + Z or restored with Ctrl + Y.
Each placed component is displayed with a position number in the Components area. If a component contains several types, you can select the desired type from the drop-down list in the Type column.
Footer
 Reset configuration to default values
Deletes all placed components and sets the Configuration to three vertically arranged positions.
 Save configuration
Opens the file explorer in which you can save the current configuration in XML format.
 Load configuration
Opens the file explorer in which you can open a configuration in XML format for use in the project.
 Draw <
 Get <
Get <
Loads the settings of an already placed configuration after selecting it.