Details on 3D Room Construction
Information about Room construction in 3D construction.
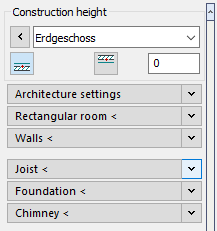
Construction height
Determines the height at which the following objects are drawn by setting the storey, reference edge and, if necessary, an offset.
| Button/Section | Description |
|---|---|
| Architecture settings | In this section you can define settings for the use of architecture objects. |
| Wall specifications | Defines the type of walls to be drawn. |
| Rectangular room | Draws a rectangular room in the drawing. The dimensions can either be entered in the input field or picked from the drawing. |
| Walls | This function allows you to draw single-shell or double-shell interior and exterior walls in 2D and 3D mode. Determine the wall thickness(es) and, if necessary, the wall height in advance. |
| Ceiling | This command can be used to draw a ceiling on a room by determining the corner points. First, determine the ceiling height, then draw the ceiling by determining the corner points. |
| Joist | This command allows you to draw a joist with freely definable dimensions at the current construction height. |
| Foundation | This command allows you to draw a foundation as a rectangular panel with freely definable dimensions. You can draw the foundation on all storeys and thus, for example, create a floor slab on the 1st storey. |
| Window | Use this command to install windows in single- or double-shell walls. |
| Doors | Use this command create interior- and exterior doors in single and double-shell walls. |
| Chimney | This command allows you to draw a chimney with definable dimensions in front of a wall or other positions. |
| Openings | In the Type of opening section, basic settings are made for openings that you can create using the Windows <, Doors < and Openings < command. |